rust-web

Rust Web

最近在学习 Rust,试着用 Rust 开发 Web 应用程序。

1. Rust Web Frameworks

使用 Rust 开发 Web 应用程序的框架有很多,以下是一些流行的选择:

example

使用actix-web 框架创建一个简单的 Web 服务。

1
2
3
4
5
6
7
8
9
10
11
12
13
# Cargo.toml
[package]
name = "webservice"
version = "0.1.0"
edition = "2024"
default-run = "teacher-service"

[dependencies]
actix-web = "4.0.0-beta.1"
actix-rt = "2.5.0"

[[bin]]
name = "server1"
1
2
3
4
5
6
7
8
9
10
11
12
13
14
15
16
17
18
19
20
21
22
23
24
25
26
27
28
// src/bin/server1.rs
use actix_web::{web, App, HttpResponse, HttpServer, Responder};
use std::io;

// route configuration
pub fn general_routes(cfg: &mut web::ServiceConfig) {
cfg.route("/health", web::get().to(health_check_handler));
}

// handler configuration
pub async fn health_check_handler() -> impl Responder {
HttpResponse::Ok().json("Acitx Web Service is running")
}

// run HTTP server
#[actix_rt::main]
async fn main() -> io::Result<()> {
// build app and configure routes
// factory function, multiple instances of the app can be created
let app = move || {
App::new().configure(general_routes)
};

// start the server
HttpServer::new(app).bind("127.0.0.1:3000")?
.run()
.await
}

访问localhost:3000/health,返回"Acitx Web Service is running"

2. Rust WebAssembly

通过浏览rustwasm可以了解如何使用 Rust 开发 WebAssembly 应用程序。

small example

使用wasm-pack创建一个简单的 WebAssembly 应用程序。

1
wasm-pack new wasm-test

然后在wasm-test目录下运行以下命令:

1
wasm-pack build

这将创建一个pkg目录,其中包含编译后的 WebAssembly 模块和 JavaScript 绑定。

然后在wasm-test目录下运行以下命令:

1
npm init wasm-app www

这将创建一个新的 Web 应用程序,并在www目录下创建一个package.json文件。

然后在www目录下运行以下命令:

1
npm install

这将安装所有依赖项。

然后在www目录下运行以下命令:

1
npm run start

访问localhost:8080,可以看到一个简单的 Web 应用程序。

p.s. 如果遇到问题,可以查看另一篇博客wasm-app 踩坑

Conway’s Game of Life

进入wasm-test目录,修改src/lib.rs文件,去掉默认的greet函数,添加以下代码:

1
2
3
4
5
6
7
8
9
10
11
12
13
14
15
16
17
18
19
20
21
22
23
24
25
26
27
28
29
30
31
32
33
34
35
36
37
38
39
40
41
42
43
44
45
46
47
48
49
50
51
52
53
54
55
56
57
58
59
60
61
62
63
64
65
66
67
68
69
70
71
72
73
74
75
76
77
78
79
80
81
82
83
84
85
86
87
88
89
90
91
92
93
94
95
96
97
98
99
100
101
102
103
104
105
106
107
108
109
110
111
112
113
114
115
116
117
118
119
120
121
122
123
124
125
126
127
#[wasm_bindgen]
#[repr(u8)]
#[derive(Clone, Copy, Debug, PartialEq, Eq)]
pub enum Cell {
Dead = 0,
Alive = 1,
}

#[wasm_bindgen]
pub struct Universe {
width: u32,
height: u32,
cells: Vec<Cell>,
}

impl Universe {
// two-dimensional index to one-dimensional index
fn get_index(&self, row: u32, column: u32) -> usize {
(row * self.width + column) as usize
}

// compute count of live cells around a cell
fn live_neighbor_count(&self, row: u32, column: u32) -> u8 {
let mut count = 0;
for delta_row in [self.height - 1, 0, 1].iter().cloned() {
for delta_col in [self.width - 1, 0, 1].iter().cloned() {
if delta_row == 0 && delta_col == 0 {
continue;
}

let neighbor_row = (row + delta_row) % self.height;
let neighbor_col = (column + delta_col) % self.width;
let idx = self.get_index(neighbor_row, neighbor_col);
count += self.cells[idx] as u8;
}
}
count
}
}

#[wasm_bindgen]
impl Universe {
// game frame
pub fn tick(&mut self) {
let mut next = self.cells.clone();

for row in 0..self.height {
for col in 0..self.width {
let idx = self.get_index(row, col);
let cell = self.cells[idx];
let live_neighbors = self.live_neighbor_count(row, col);

let next_cell = match (cell, live_neighbors) {
// rule 1: dead if less than 2 neighbors
(Cell::Alive, x) if x < 2 => Cell::Dead,
// rule 2: live if 2 or 3 neighbors
(Cell::Alive, 2) | (Cell::Alive, 3) => Cell::Alive,
// rule 3: dead if more than 3 neighbors
(Cell::Alive, x) if x > 3 => Cell::Dead,
// rule 4: generate if exactly 3 neighbors when dead
(Cell::Dead, 3) => Cell::Alive,
// otherwise: keep the same state
(otherwise, _) => otherwise,
};

next[idx] = next_cell;
}
}

self.cells = next;
}

// initialize the universe
pub fn new() -> Universe {
let width = 64;
let height = 64;

let cells = (0..width * height)
.map(|i| {
if i % 2 == 0 || i % 7 == 0 {
Cell::Alive
} else {
Cell::Dead
}
})
.collect();

Universe {
width,
height,
cells,
}
}

// render the universe
pub fn render(&self) -> String {
self.to_string()
}

pub fn width(&self) -> u32 {
self.width
}

pub fn height(&self) -> u32 {
self.height
}

pub fn cells(&self) -> *const Cell {
self.cells.as_ptr()
}
}

use std::fmt;

impl fmt::Display for Universe {
fn fmt(&self, f: &mut fmt::Formatter) -> fmt::Result {
for line in self.cells.as_slice().chunks(self.width as usize) {
for &cell in line {
let symbol = if cell == Cell::Dead { '◻' } else { '◼' };
write!(f, "{}", symbol)?;
}
write!(f, "\n")?;
}

Ok(())
}
}

以上代码实现了一个简单的Conway's Game of Life游戏逻辑

接着在www目录下的index.js中添加以下代码:

1
2
3
4
5
6
7
8
9
10
11
12
13
14
15
16
17
18
19
20
21
22
23
24
25
26
27
28
29
30
31
32
33
34
35
36
37
38
39
40
41
42
43
44
45
46
47
48
49
50
51
52
53
54
55
56
57
58
59
60
61
62
63
64
65
66
67
68
69
70
71
72
73
74
75
76
77
78
79
80
81
82
83
import { Universe, Cell } from "wasm-test";
import { memory } from "wasm-test/wasm_test_bg.wasm";

const CELL_SIZE = 5; // px
const GRID_COLOR = '#CCCCCC';
const DEAD_COLOR = '#FFFFFF';
const ALIVE_COLOR = '#000000';

// Construct the universe, and get its width and height.
const universe = Universe.new();
const width = universe.width();
const height = universe.height();

// Give the canvas room for all of our cells and a 1px border
// around each of them.
const canvas = document.getElementById("game-of-life-canvas");
canvas.height = (CELL_SIZE + 1) * height + 1;
canvas.width = (CELL_SIZE + 1) * width + 1;

const ctx = canvas.getContext('2d');

const drawGrid = () => {
ctx.beginPath();
ctx.lineWidth = 1 / window.devicePixelRatio;
ctx.strokeStyle = GRID_COLOR;

// Vertical lines.
for (let i = 0; i <= width; i++) {
ctx.moveTo(i * (CELL_SIZE + 1) + 1, 0);
ctx.lineTo(i * (CELL_SIZE + 1) + 1, (CELL_SIZE + 1) * height + 1);
}

// Horizontal lines.
for (let j = 0; j <= height; j++) {
ctx.moveTo(0, j * (CELL_SIZE + 1) + 1);
ctx.lineTo((CELL_SIZE + 1) * width + 1, j * (CELL_SIZE + 1) + 1);
}

ctx.stroke();
};

const getIndex = (row, column) => {
return row * width + column;
};

const drawCells = () => {
const cellsPtr = universe.cells();
const cells = new Uint8Array(memory.buffer, cellsPtr, width * height);

ctx.beginPath();

for (let row = 0; row < height; row++) {
for (let col = 0; col < width; col++) {
const idx = getIndex(row, col);

ctx.fillStyle = cells[idx] === Cell.Dead
? DEAD_COLOR
: ALIVE_COLOR;

ctx.fillRect(
col * (CELL_SIZE + 1) + 1,
row * (CELL_SIZE + 1) + 1,
CELL_SIZE,
CELL_SIZE
);
}
}

ctx.stroke();
};

const renderLoop = () => {
universe.tick();

drawGrid();
drawCells();

requestAnimationFrame(renderLoop);
};

drawGrid();
drawCells();
requestAnimationFrame(renderLoop);

index.html中添加以下代码:

1
2
3
4
5
6
7
8
9
10
11
12
13
14
15
16
17
18
19
20
21
22
23
24
25
26
27
28
29
<!DOCTYPE html>
<html>
<head>
<meta charset="utf-8">
<title>Hello wasm-pack!</title>
<style>
body {
position: absolute;
top: 0;
left: 0;
width: 100%;
height: 100%;
display: flex;
flex-direction: column;
align-items: center;
justify-content: center;
}
</style>
</head>
<body>
<noscript>This page contains webassembly and javascript content, please enable javascript in your browser.</noscript>
<body>
<canvas id="game-of-life-canvas"></canvas >
<script src="./bootstrap.js"></script>
</body>

<script src="./bootstrap.js"></script>
</body>
</html>

以上两份代码实现了一个简单的Conway's Game of Life渲染逻辑和游戏循环。

回到wasm-test目录下,运行以下命令:

1
wasm-pack build

再进入www目录下,运行以下命令:

1
npm run start

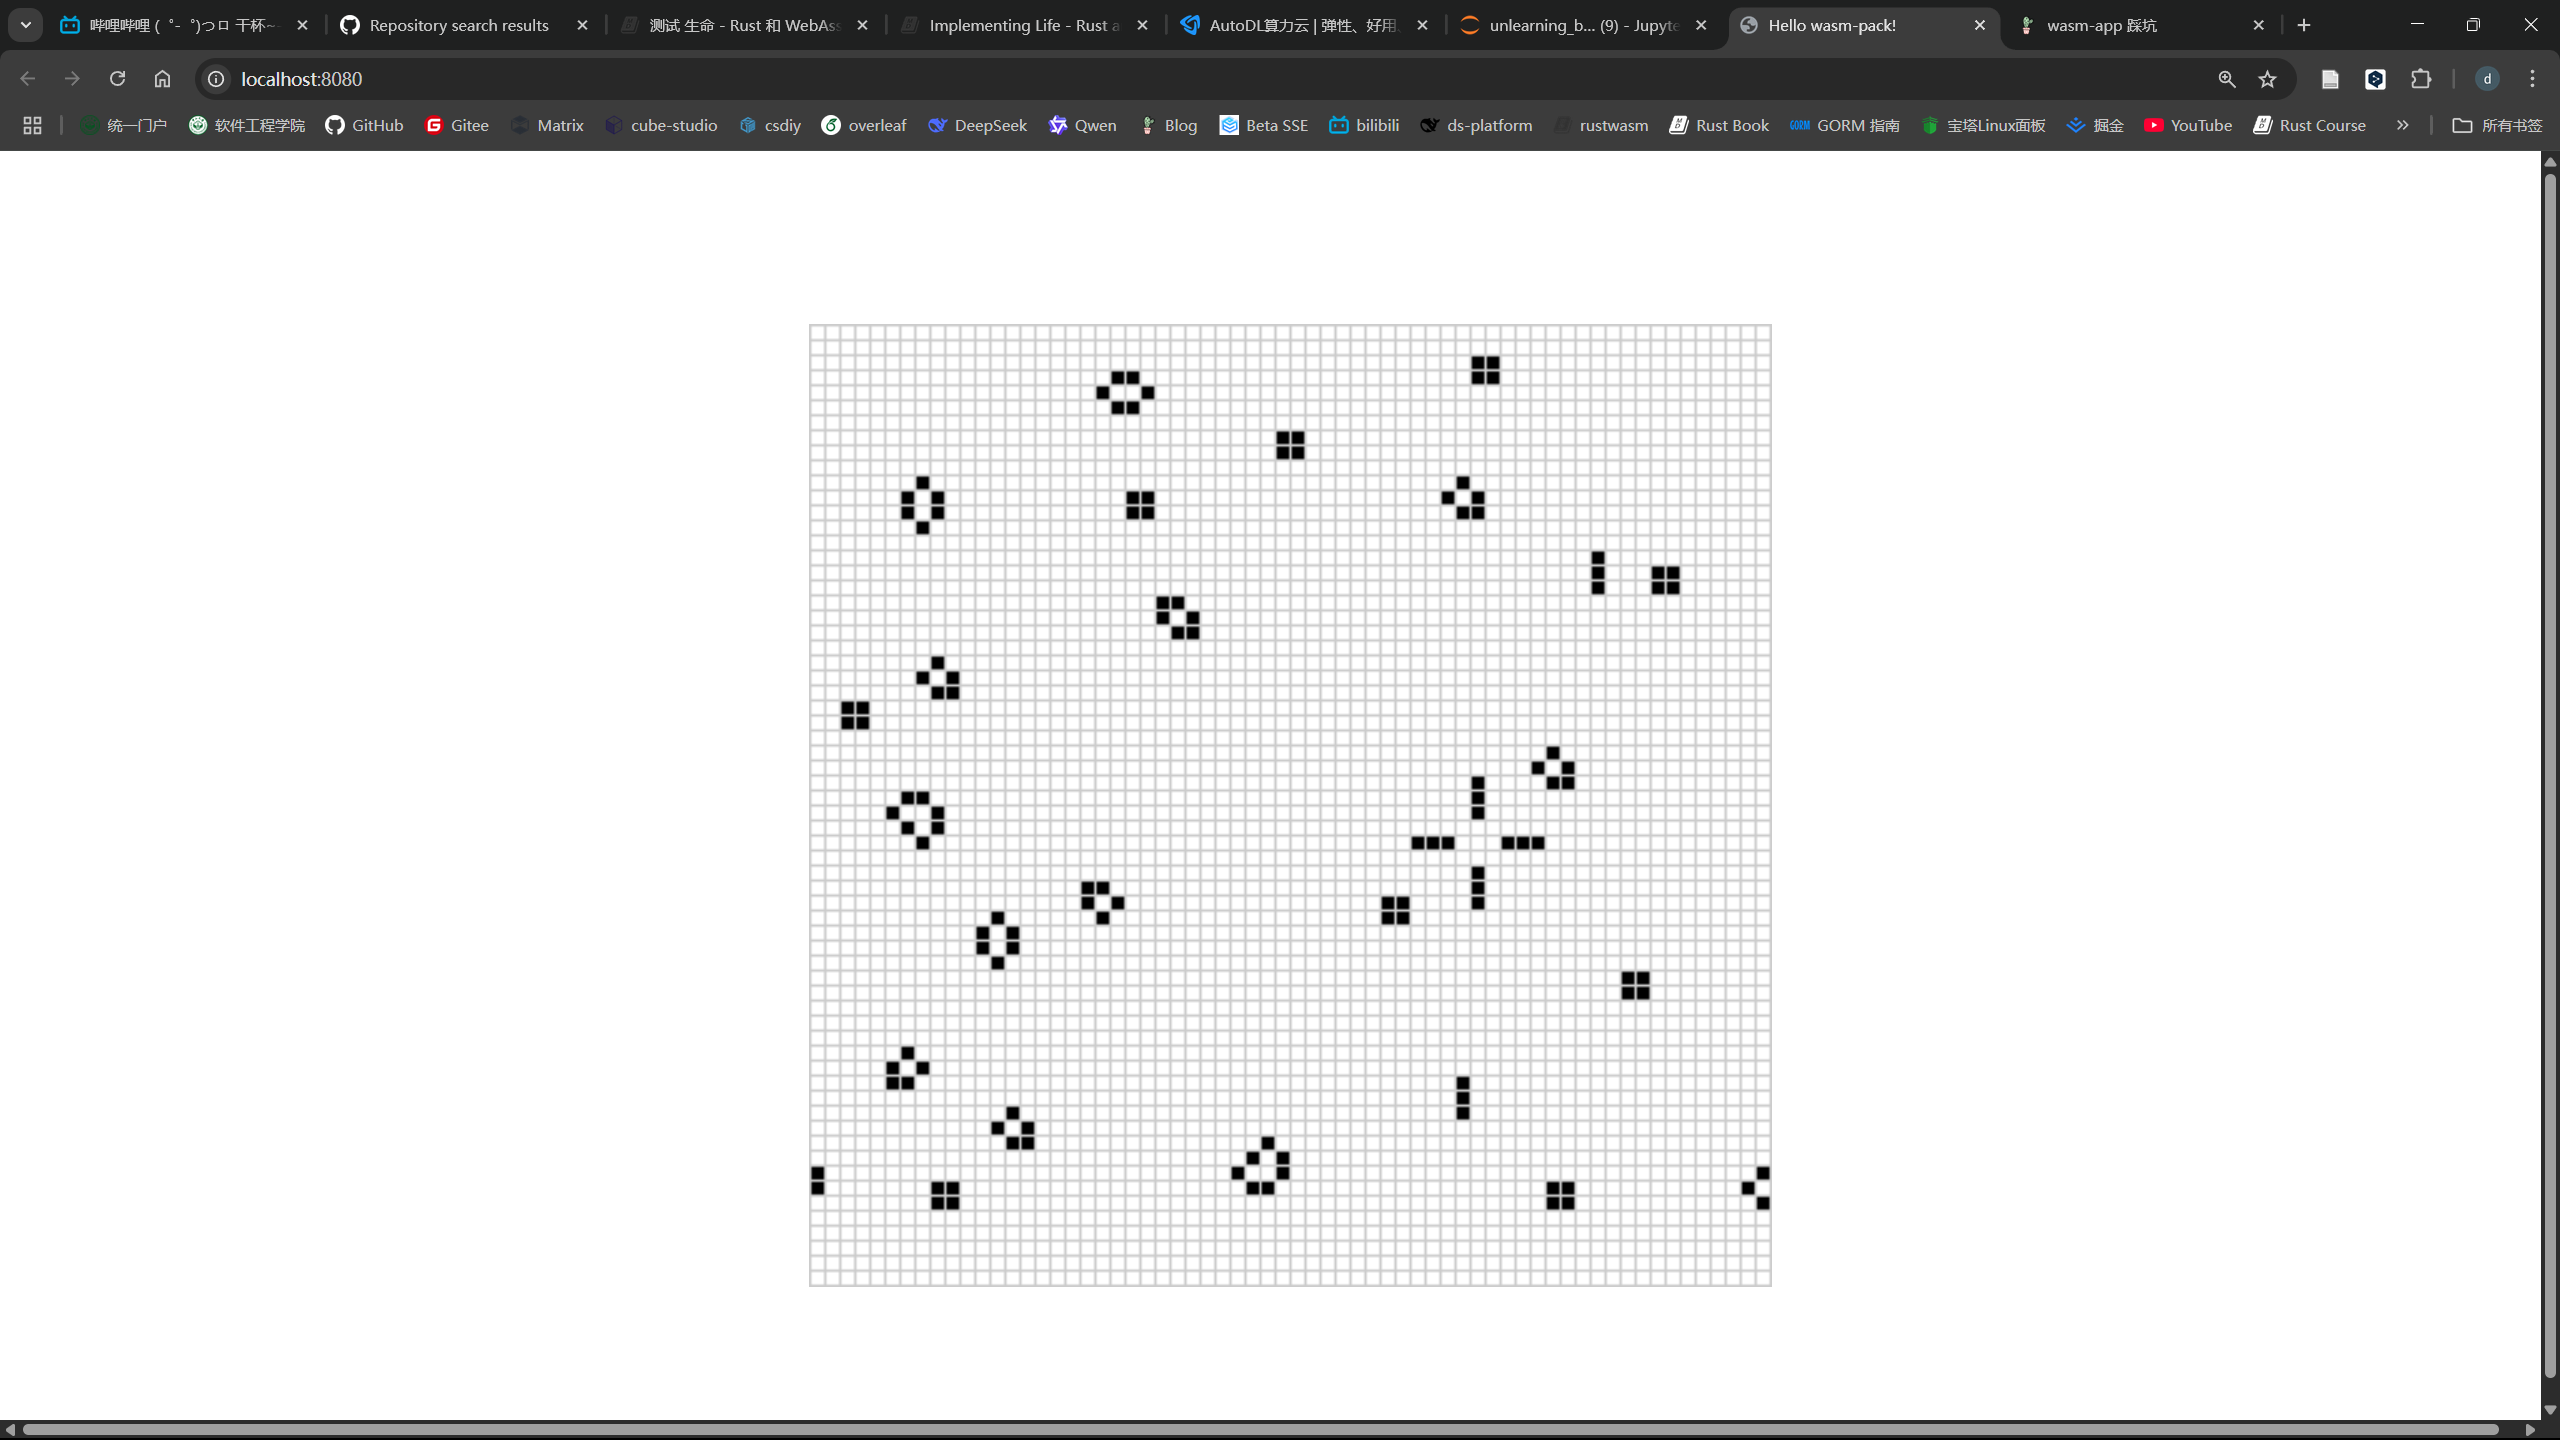
访问localhost:8080,可以看到一个简单的Conway's Game of Life游戏。

alt text

3. rustwasm + actix-web

learning…